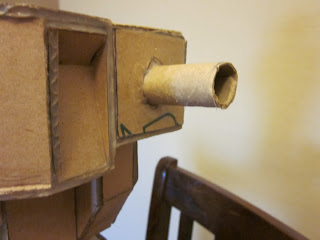
Step 1: Put some glue on a toilet paper roll, roll it up tight, and let it dry. Once dried, anchor it to a cardboard base and glue it in tight.
Step 2: Cut a hole into a piece of cardboard that you plan on using as the moving part. This piece will be the foundation of the rotating shoulder. The hole should fit very snug around the toilet paper roll. In addition, I like to put a light layer of tacky glue around the hole to make it more durable. This prevents the cardboard from tearing.
Step 3: Place the moving piece onto the toilet paper roll after the glue is dried. Don't worry if the piece fits tight. The snugger it is, the better.
Step 4: Cut any excess from the toilet paper roll. You just want a little bit of it sticking out.
Step 5: Use some scissors and cut four slits into the toilet paper roll. Then fold them back against the moving part.
Step 6: Cut out a small piece of cardboard and glue it against the flaps you cut. Make sure you only have glue on the flaps and not on the moving piece. Put pressure against the flaps for about 45 seconds so everything is nice and smashed together. Then let it dry for a few minutes. Super Secret Tip: Having a fan blowing on high is a great tool for helping tacky glue dry. The fan will dry the exposed layer of glue and let you move on without worrying about unwanted dripping.
Step 7: Now it's time to cut out the "walls" of your shoulder and glue them to your moving part.
Step 8: Once the "walls" have dried, glue on the shoulders "roof". You should basically have a complete shoulder now.
Step 9: Fill in the rest of the shoulder, if necessary, and make sure all your edges are filled in with tacky glue.
Super Secret Tip: Filling in the edges of cardboard with tacky glue reinforces the piece and makes it very durable. This process takes time but the results are very rewarding. You will be surprised just how solid a cardboard figure can become.
Step 10: Let the new shoulder joint dry overnight and you have yourself a rotating joint. Now it's time to add the rest of your arm. This is one of my favorite ways of making a movable joint but their are tons of other ways to accomplish the same goal. I recommend you experiment with your own ideas and see what technique you like using the best.
In conclusion, I wanted to share with you my tacky glue of choice. Aleene's has never done me wrong and it is a great tool to have when working with cardboard. I highly recommend it if you don't have a brand you already trust.


No comments:
Post a Comment